Get started
Declare a page, add settings to it, and read them, in three steps.
Put the code from the first two steps in any script in your project, let Unity compile, then open
Edit > Project Settings. All types are in the SettingsKit namespace.
1
Declare a page
A page is one entry in the left-hand list of the settings window.
using SettingsKit;

public sealed class GamePage : SettingsPage
{
    public override string Path => "Settings Kit Demo";   // shown under Project Settings > Settings Kit Demo
    public override string Description => "Settings Kit demo of build settings: shipped into the build, read anywhere, no Resources folder.";
    public override string HelpUrl => "https://justetools.net/settings-kit/documentation/";
}
2
Add settings to it
Each settings class becomes a section on the page, with one row per field.
using SettingsKit;
using UnityEngine;

[System.Serializable]
[SettingsDisplay("Audio")]
public sealed class AudioDefaults : BuildSettingsEntry<GamePage>
{
    [SerializeField, Range(0f, 1f)] float masterVolume = 0.8f;
    [SerializeField] bool muteOnFocusLoss = true;

    public float MasterVolume => masterVolume;
    public bool MuteOnFocusLoss => muteOnFocusLoss;
}
3
Read them anywhere
From any script, in the editor or at runtime in a build:
float volume = Settings<AudioDefaults>.Instance.MasterVolume;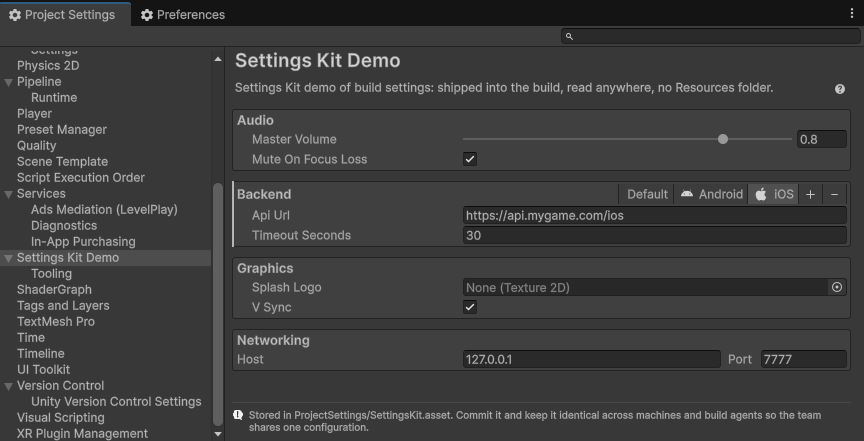
Steps 1 and 2 declare this page and its Audio section. The other sections are covered in Declare settings.
There is no asset to create and nothing to register, and the values are included in your next build.